Learning how to use a milling machine is an important step for any beginning machinist. With precision metal-cutting capabilities, a mill (along with a lathe) is a must-have for any machine shop.
Get to know this vital machine with this buyer’s guide and overview of basic operation.
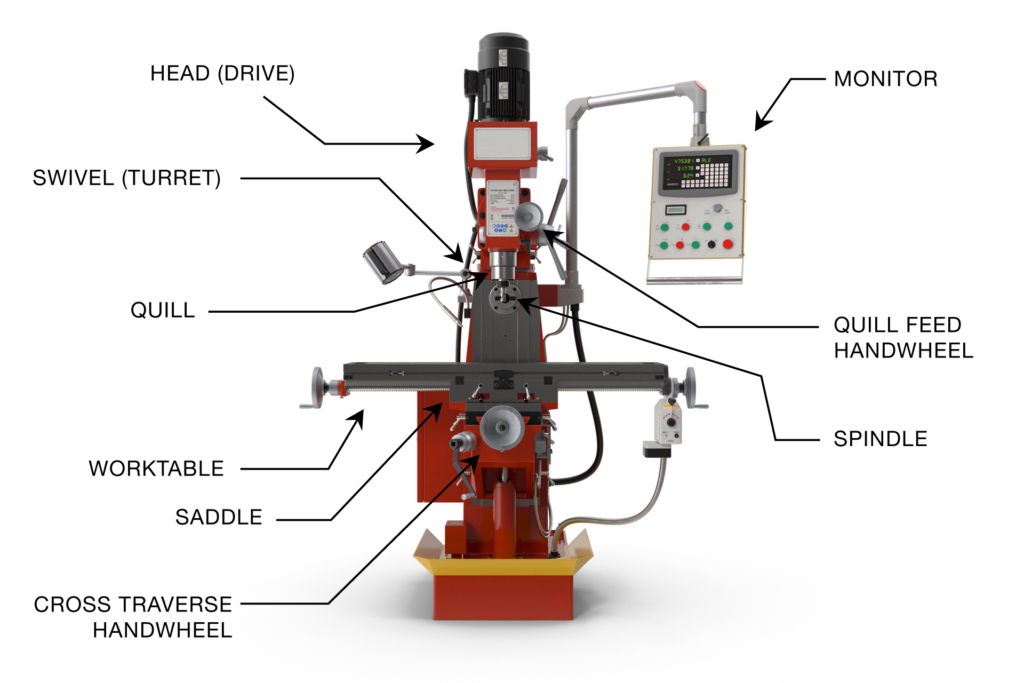
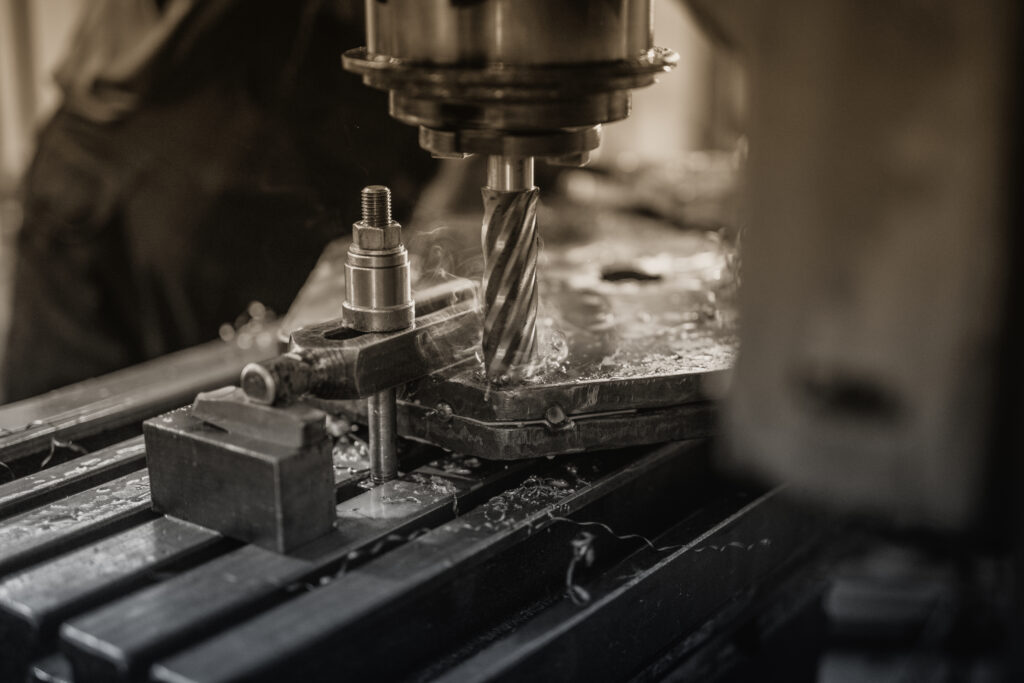
By rotating a cutting tool, or spindle, against your workpiece, a mill can cut metal for a wide range of complex parts. Here are the key parts you need to know:
Head (Drive) – Houses the motor and drive mechanism that powers the spindle.
Monitor – Displays essential information and settings, including spindle speed, power feed rate, and tool positioning.
Swivel (Turret) – Rotates the spindle horizontally or vertically, providing flexibility in machining various angles and contours.
Quill Feed Handwheel – Controls the vertical movement of the quill, which holds the cutting tool. Turn to adjust the depth of tool penetration into the workpiece.
Quill – Vertical shaft attached to the spindle. Moves up and down for accurate cutting tool position.
Spindle – Rotating shaft that holds and rotates the cutting tool. Provides the primary motion for cutting metal workpieces.
Worktable – Secures the workpiece. Adjusts vertically, horizontally, or angularly to position the workpiece relative to the cutting tool.
Saddle – Supports and guides the movement of the worktable along the machine’s bed.
Cross-Traverse Handwheel – Controls the lateral movement of the worktable and saddle assembly, allowing precise positioning of the workpiece under the cutting tool.

A mill is a powerful machine that commands respect. If you can’t be bothered to take proper precautions, you won’t last long in the machining discipline. So before we talk about basic operation, we have to talk about safety.
First off, always wear your PPE. Safety glasses and steel-toed boots at all times.
OK, that’s what you must wear. Now here’s what to avoid wearing: anything that might get caught in the machine and pull you toward it. You want to cut metal, not skin and bones.
Therefore:
The other factor of the safety equation is learning and always following safe operation. Lock out the machine before making any adjustments.
Milling machines come in various types, each designed for specific machining tasks and applications. Here are some of the common ones you might encounter:
The standard knee mill (often called Bridgeport style for the best-known manufacturer) features a vertically adjustable spindle mounted on a stationary column. The worktable moves horizontally along the saddle and vertically along the knee, providing flexibility in machining various shapes and sizes of workpieces.
A vertical milling machine is a broader category that features a vertically oriented spindle. It may lack the knee and saddle assembly.
Here, the spindle is positioned horizontally, perpendicular to the worktable. This setup allows for machining of workpieces along both the X and Y axes, making it suitable for production milling and heavy-duty cutting operations.
CNC mills are automated machines controlled by computer programs. They offer precise control over cutting parameters to perform complex machining tasks with high accuracy and repeatability.
A bed mill has a stationary bed or base that supports the workpiece and a vertically adjustable spindle mounted on a movable gantry or column. This design provides stability and space for heavy-duty or large-scale milling operations.
A turret milling machine is a type of vertical milling machine that has a head that can swivel on a vertical axis, allowing the cutting tool to approach the workpiece from different angles offering added versatility over a traditional knee mill.
A universal milling machine provides a swiveling table that allows for machining workpieces at various angles. It is a versatile tool for machining complex shapes and contours, making it suitable for diverse applications.
For beginners, starting with a Bridgeport-style standard knee mill makes sense. The versatility, variety of informational resources, and relative ease of operation offer a solid foundation for learning milling fundamentals and mastering basic machining techniques.
A new milling machine looks pretty darn cool. But evaluating a mill is about a lot more than checking out the sleek finish. Let’s run down the most important aspects to ensure you get the performance and versatility you need.
A mill’s size—ranging from minis and benchtops, to standard-sized Bridgeport style, to larger bed and universal mills—directly impacts the machine’s capability and versatility.
To determine the size you need, consider:
Our take on size? Opt for a medium-sized milling machine, such as a 9” x 42” knee mill. You’ll get a balance between versatility, ease of use, and availability of accessories and tooling.
Here are some essentials for optimal performance and versatility:
There’s no shortage of mill manufacturers and brand names. And it’s tempting to pick just based on price. But you’ll get what you pay for.
Given the rugged requirements of a milling machine, you’re better off investing in a reputable brand. You’ll enjoy better build quality, performance, and reliability if you choose from proven brands including:
Now that you have a sense of what’s available, let’s take a look at what you need to know to get started using your mill.
Your mill may not be perfectly aligned when you first encounter it. These imperfections can lead to inaccurate results. So first, you need to set up the machine in two critical ways. Watch the video above for a full demonstration.
Adjust the head so that the angle of your spindle to the table is a neat 90 degrees.
Make sure your vise jaw is properly aligned to the head to enable parallel cuts. Indicating a vise can be a complicated process. But here’s a relatively simple method.
Your first approach with the end mill to cut metal is called touching off. It’s your chance to make sure everything is in order to get precise machining results.
Here’s an overview of the process. Watch the video above for a complete demonstration (plus some insights on selecting good end mills).
Once you’ve got everything lined up and zeroed out, you can make cuts as specified.
To get to your final spec and get a good surface finish, you will probably need to do multiple passes instead of doing the whole cut in one go. But don’t worry; doing multiple passes makes for good practice—and it’s good for tool life, too.
OK, now you’ve got a good base of milling machine knowledge.
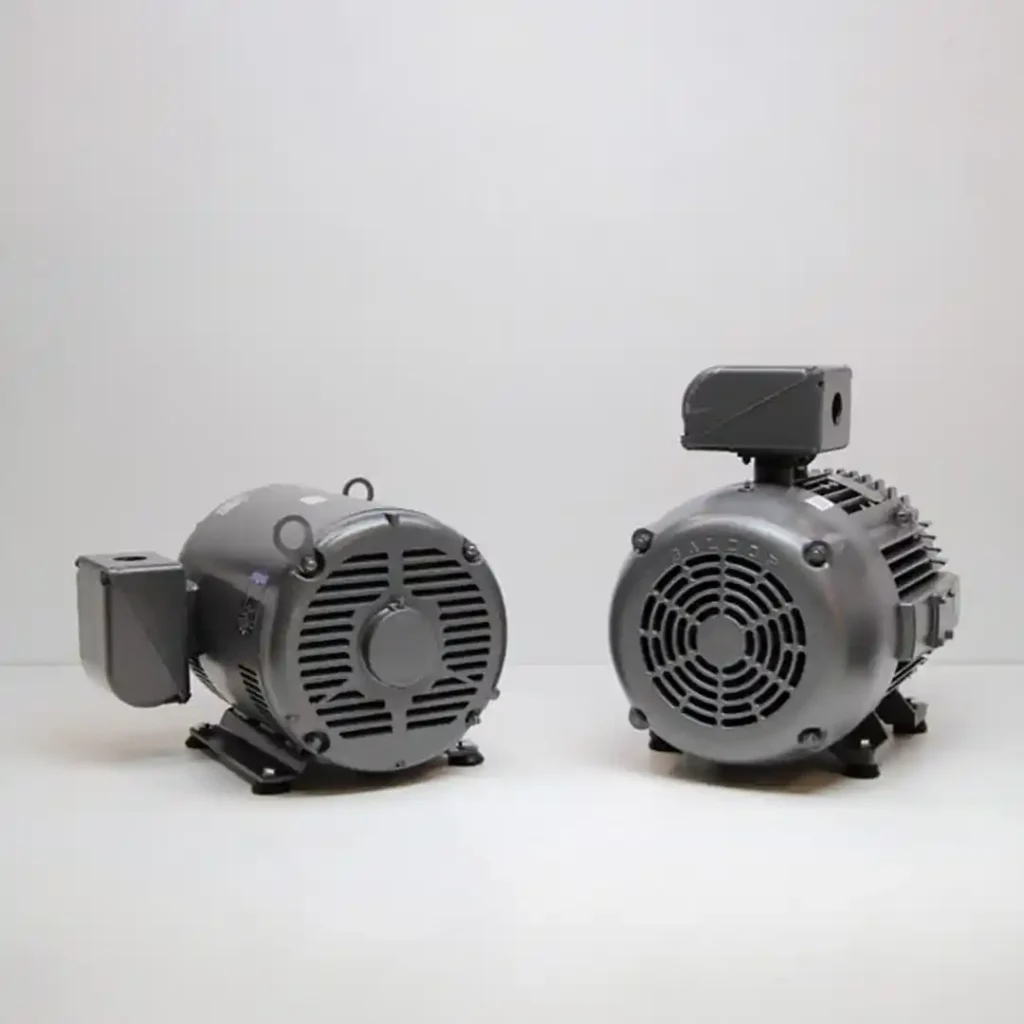
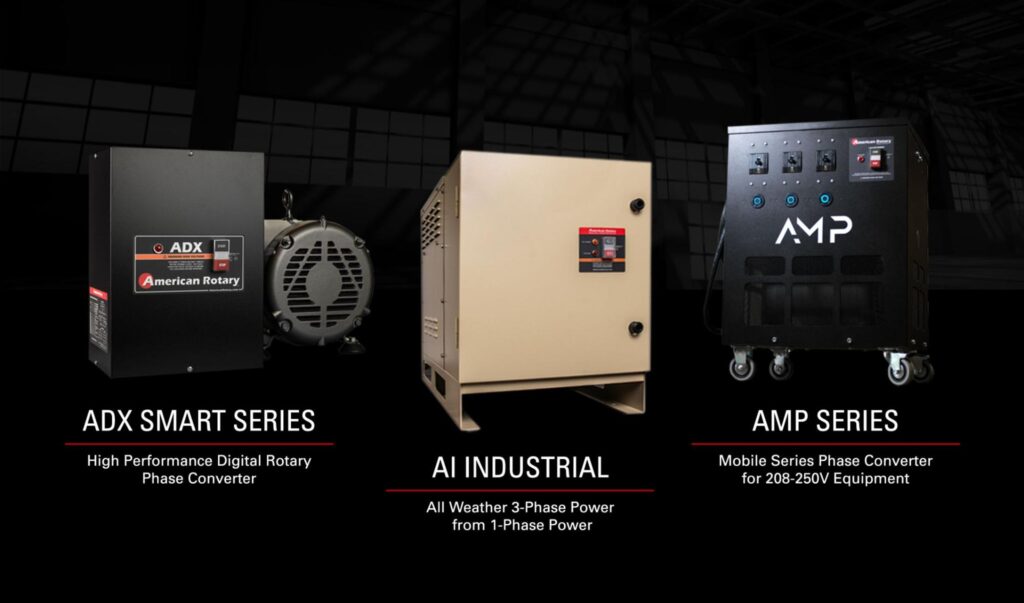
But here’s one more important aspect to consider: how to power your mill. A mill powered by three-phase electricity will offer smoother, more efficient operation. The only question is how to get that 3-phase in your shop.
In that case, a rotary three-phase converter is a great solution. It converts the typical single-phase electricity service into balanced three-phase power. A USA-made American Rotary phase converter can even provide smooth power for your whole shop—including both 3-phase and single-phase machines.
Contact us for help sizing a converter for your needs. And good luck in your milling adventures!